


Explore the critical role of work rates in EA Sports FC 24, where each player’s performance is shaped by their unique attacking and defensive contributions.
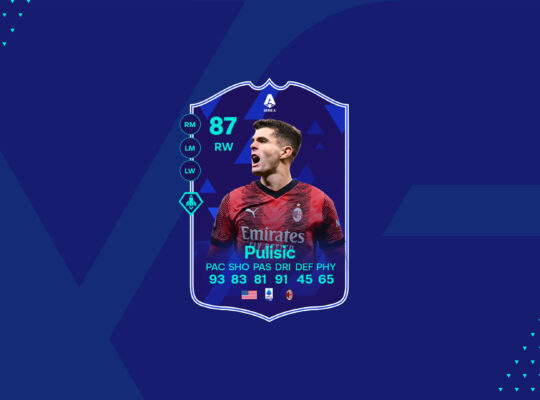
With over 17,000 players and a wide range of ratings and play styles, EA Sports FC 24 is a pretty detailed football simulation game. Of all the variables that affect a player’s performance, work rates are one of the most important ones because they tell us how much each player gives their attack and defence on the field.
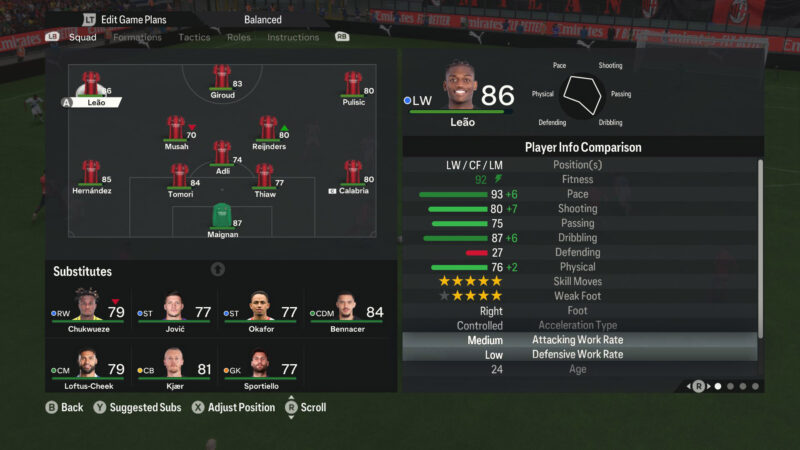
Work rates are classified as high, medium, or low for both offensive and defensive contributions. The subtleties of these work rates profoundly affect how players behave, guiding their placement, movements, and general level of engagement in the game.
Understanding Work Rates in Action
Work rates in FC 24 refer to how actively a player engages in offensive and defensive actions during a match.
- High Attacking Work Rate: Players with this work rate are the engines of the attack. They eagerly make forward runs, seeking prime positions to contribute to scoring opportunities. Picture a striker hungry for goals, constantly pressuring the opponent’s defence.
- Low Attacking Work Rate: Conversely, players with a low attack work rate are likelier to stay back as the team moves the ball forward. Imagine a midfielder who stays out of the attacking third and instead serves as a pivot in plays.
- High Defensive Work Rate: Defenders or defensive midfielders with this work rate actively track back, providing additional support to the defence. It’s the defensive stalwart who ensures resilience at the back.
- Low Defensive Work Rate: Players with a low defensive work rate focus more on attacking endeavours. Imagine a full-back with a flair for joining the attack, leaving defensive responsibilities to others.
The Medium Work Rate for both attack and defence is a balance between High and Low.

Each player is assigned a combination of attacking and defensive work rates, and these greatly shape how the player engages with offensive and defensive actions during a match. Work rates significantly impact positioning, movement, and overall gameplay.
The following explains how the most common combinations of work rates influence player performance:
- High/High (H/H): Players with high attacking and defensive work rates are known for their relentless work ethic. They actively contribute both in attack and defence, covering a large portion of the pitch. This work rate is often seen in box-to-box midfielders who tirelessly contribute at both ends.
- High/Medium (H/M): Players with high attacking and medium defensive work rates are more attack-oriented but still track back to provide defensive support. This work rate is common among attacking midfielders who participate in both phases of play.
- High/Low (H/L): Players with a pronounced attacking inclination and a tendency to stay forward. This work rate is common among attackers with a relentless focus on goal-scoring while minimising defensive contributions.
- Medium/High (M/H): Players with medium attacking and high defensive work rates are more defensive-minded. They tend to stay back during attacks, making them suitable for defensive positions like centre-backs or defensive midfielders.
- Medium/Medium (M/M): This balanced work rate combination means a player contributes equally to both attack and defence. It’s often found in versatile players who can adapt to various positions on the pitch.
Behavioural Impact
Work rates extend their influence beyond a player’s initial starting point, creating a dynamic ebb and flow on the pitch. For instance:
- Pressing and Closing Down: Players with strong defensive work rates tend to press opponents more forcefully, applying pressure to the player carrying the ball. Turnovers may result from this disruption of the opposition’s build-up play.
- Attacking Involvement: Players with high attacking work rates are likelier to run into the box and set themselves up for goals. For attacking midfielders and strikers, this is essential.
- Team Balance: Balancing work rates among positions ensures a cohesive team dynamic. For example, a midfield mix of medium/high and high/medium work rate players can balance both offence and defence.
Tactical Considerations
Work rates become strategic tools when aligning players with specific formations, custom tactics, or instructions. Considerations include:
- Formation Alignment: Tailor your squad to the work rates that complement your preferred formation. For example, having full-backs with high attacking work rates can enhance your team’s width.
- Player Instructions: Use player instructions to further customise the behaviour of individual players. For instance, you can instruct a midfielder with high attacking work rates to stay forward during attacks.

Player Development in Career Mode
While some Evolutions allow you to change a player’s work rates in the Ultimate Team mode, they are largely fixed. Career Mode, however, allows managers to shape and mould their players over time through the Player Development feature. This allows for greater influence on a player’s work rates.
Each player’s unique work rate configuration adds layers of complexity to squad building and tactical decisions, making them a critical factor on the virtual pitch. As you embark on your journey in EA Sports FC 24, pay close attention to work rates, as they are the subtle architects of player behaviour, shaping the ebb and flow of every virtual match. Mastering the intricacies of work rates will elevate your squad-building and strategic prowess in pursuing glory in football.